Apologies in advance for the lack of photography. I haven't quite mastered the art of capturing delectable mushy food ( Crispy on the other hand I make look good right?). Therefore, I shall attempt to make this dish sound almost as delicious as it really is!
Confession: I found this on Pinterest; no claims to creativity here. But, I just had to share it because it is delicious, perfect for meatless Fridays during Lent (or whenever), oh, and did I mention it's easy? Ridiculously, wonderfully easy.
You will need:
A large slow cooker (6 quarts)
1 bag of fresh spinach
1 bag of tortellini (I used cheese stuffed)
1 block of cream cheese
2 14 oz cans diced tomatoes
1 box or 4 cups of vegetable broth
Garlic powder and Italian seasoning to taste
What you do:
Pour the vegetable broth, drained tomatoes and block of cream cheese in the bottom of the slow cooker. Chunk up the cream cheese (Um, I used a big spoon, but however you are able to mush up sticky, mushy cream cheese into large chunks easily will work just as well)
Add the whole bag of spinach. Mix it up a bit to get all the spinach to mush down a bit (Lots of mushiness in this recipe). Then mix in your tortellini. Add seasonings. Cook on low for 4 hours. Stir up about 15 minutes before done and then again right before serving. Make sure all the cream cheese is mixed in.
The sauce should look nice and creamy. We served it in bowls since it was a bit more like soup the first time. It was a bit thicker the second time (haven't quite figured out why yet), but still just as delicious.
Review:
Hubby loved this, I loved this, guests have loved it the two times I've served it, so I would rate this recipe a success. Also, it took me literally about five minutes to dump everything in the slow cooker which is another bonus. Great for cold winter nights or when you're craving comfort food. Enjoy!
Monday, February 25, 2013
Tuesday, February 5, 2013
It's Either About a Prison or the Holocaust
...said my roommate when I told her I was reading the book The Boy in the Striped Pajamas, by John Boyne. If you don't want to know whether it is about prison or the Holocaust, I recommend you stop reading my post (although, don't worry, I won't give anything else away). But I definitely recommend the book!
It is, of course, about the Holocaust. I stumbled upon this book when I saw the entire 8th grade class carrying it around school. I was convinced to read it when I caught one of my 8th graders reading it during one of MY lessons. I thought to myself, "Either I'm a boring teacher, or that book is really good." I knew the former couldn't be true, so I assumed the latter and decided to mosey downstairs during my plan to borrow one of those books from the English room.
I borrowed the book on a Monday and I finished it after school that Wednesday. Granted it is only 277 pages, but I'm a teacher and a grad student and usually get angry when I see people in coffee shops reading for fun because I wish I had the time. Apparently, for the right book, I do.
Like other Holocaust literature (The Diary of Anne Frank, Number the Stars, The Book Thief, etc), the book contains the common themes of humanizing the de-humanized, re-discovering the horrors from a unique perspective, juxtaposing innocence and evil, forming and breaking relationships, realizing we need to open our eyes to the "holocausts" of our time, etc.
The book is told from the perspective of a 9 year-old boy, Bruno, whose dad is a commander at the concentration camp his family moves in next to. We get to see the world from the mind of Bruno, not an ignorant mind, just formed by everything he is familiar with- his parents and annoying sister, his three best friends, his bustling city, his housemaids- there is no familiarity with anything remotely related to the Holocaust, so he simply does not have a clue to what is happening at the place he sees across the fence when he looks outside of his window. This perspective creates one of the most powerful themes from the book, which, as stated in the author's note, is misconception and misunderstanding. My English studies mind appreciated the child-like perspective, how the writing style nearly perfectly matched that, and all of those other previously mentioned deep themes, but the part my emotional self appreciated the most was the simple theme of friendship (read: at the first mention of best friends I was crying on the couch).
As I was reading this book, my mind kept traveling back to my visit to Auschwitz my junior year of college. I still think back on this with very puzzling memories. The day our school visited was a sunny day and my impression of Auschwitz was that of a place where I could see kids playing in the brick streets surrounded by the brick buildings. Our tour included stops like seeing the gas chambers, piles of shoes and clothes, and the cells. I knew I should be sad and moved, but I was either so exhausted or so emotionally drained that I could hardly given any emotional response, even when Fr. Dave made me stand in a cell with three other people. It wasn't until we went to see an art room filled with drawing created by someone who lived at the concentration camp. It wasn't the incredibly skeleton-like bodies or the hollow faces that got me, but the fact that the pictures portrayed friendship. I remember standing in the room surrounded by pictures of bony figures, looking around at my friends next to me, and, again, that was the point I lost it with the tears.
So, when you are looking for a quick, meaningful read, this would be a good book to pick up. Like a visit to Auschwitz, the horrors of the Holocaust are clear in the story, but like the art I saw on my trip, even more clear is the remaining presence of love and friendship.
Monday, February 4, 2013
Why Women Really Should Stay in the Kitchen
Women should stay in the kitchen because men might die while occupying the space. Not because they can't use knives, and not because they can't clean properly (I have learned many useful cleaning tips from my own husband), but because the recipes they come up with might really be lethal.
Jeremy used to joke that the only chicken recipes he could make was chicken alfredo. Well we know how healthy alfredo sauce is for you. But that's honestly child's play compared to what he came up with last night
We were listening to a comedian, Jim Gaffigan, who was going on and on about bacon. Who doesn't love bacon!? Jeremy looks at me and says, with a scary brightness in his eyes, "Why hasn't anyone DEEP FRIED bacon?"
I blinked, stared at him for a bit, and replied, "Well, darling, probably because it would kill you".
Ok, we don't really use pet names like darling, but it fit.
Unconvinced, he continued to mention it for a week or so. Last weekend he smiled nicely and asked, "Can we have a superbowl party here?"
"Um sure"
"Ok great!"
pause
"Can I make deep fried bacon!?"
And he did. In all it's deep fried baconey glory.


Happy Ending: No one actually died in the process nor after consumption. I might also add that I always do appreciate Jeremy in the kitchen despite his artery clogging recipes!
COUNTRY FRIED BACON
Jeremy used a deep fryer
Ingredients:
2 cups flour
1 lb thick cut bacon
2 eggs
1/4 cups milk
salt and pepper to taste
Maple syrup (for dipping)
Preheat oven to 350. Whip up your eggs and milk in a bowl. Combine flour, salt and pepper in flat pan or bowl. Cut your bacon in half. Dip in eggs and then coat in flour. Place in deep fryer for about 5 minutes or until looking bubbly. Remove and place on a baking sheet. Put in oven for a few minutes or until golden brown. Serve with maple syrup.
Jeremy used to joke that the only chicken recipes he could make was chicken alfredo. Well we know how healthy alfredo sauce is for you. But that's honestly child's play compared to what he came up with last night
We were listening to a comedian, Jim Gaffigan, who was going on and on about bacon. Who doesn't love bacon!? Jeremy looks at me and says, with a scary brightness in his eyes, "Why hasn't anyone DEEP FRIED bacon?"
I blinked, stared at him for a bit, and replied, "Well, darling, probably because it would kill you".
Ok, we don't really use pet names like darling, but it fit.
Unconvinced, he continued to mention it for a week or so. Last weekend he smiled nicely and asked, "Can we have a superbowl party here?"
"Um sure"
"Ok great!"
pause
"Can I make deep fried bacon!?"
And he did. In all it's deep fried baconey glory.
Happy Ending: No one actually died in the process nor after consumption. I might also add that I always do appreciate Jeremy in the kitchen despite his artery clogging recipes!
COUNTRY FRIED BACON
Jeremy used a deep fryer
Ingredients:
2 cups flour
1 lb thick cut bacon
2 eggs
1/4 cups milk
salt and pepper to taste
Maple syrup (for dipping)
Preheat oven to 350. Whip up your eggs and milk in a bowl. Combine flour, salt and pepper in flat pan or bowl. Cut your bacon in half. Dip in eggs and then coat in flour. Place in deep fryer for about 5 minutes or until looking bubbly. Remove and place on a baking sheet. Put in oven for a few minutes or until golden brown. Serve with maple syrup.
Saturday, February 2, 2013
The Cat in the Hat (Part 1)
So, most Preschool/Elementary Educators know that Dr. Seuss' birthday is coming up on March 2nd. With all the much-needed breaks Dr. Seuss books provide us (they serious take about 20 minutes to read, but yet the children are somehow entertained through the whole thing)....how could we not remember the man's birthday? So we are having a "Birthday Party" for Dr. Seuss at my preschool on March 1st. First of all, I have a secret passion for themed parties in general, but a children's themed party is just going to be over the top! Luck for me, I work with another teacher who is just as into this party as I am. So, as we start planning and making things for this, "Dr. Seuss Birthday Party", I will be posting them on this blog which is why this one is labeled as "part 1".
One of the games I came up with for our party is a, "Pin the tail on the Cat in the Hat". In order to have this game we obviously need a "Cat in the Hat" picture. There may have been easier ways to do this, but they probably wouldn't be as crafty or hands on. I decided to draw the "Cat" myself. I am an okay drawer with pretty simple things. I had a lot of confidence that I could draw a pretty good "Cat" body, but the face was going to be tricky.
 So the first thing I did was find an image that I wanted to copy. This one fit because it would be easy to make the tail detachable for the game.
Next, I sketched his body onto a large piece of butcher paper with a pencil. The pencil is very forgiving when you mess up, so I always use it to outline my drawings. The "Cat in the Hat"'s body is pretty simple, so I just drew this free-hand.
The face is the tricky part, so I blew up his face on Microsoft Word and printed it out. I placed it where I wanted his face to be in the picture and traced over the print out with a sharpie. I traced around the black lines, and not on them. This allows the black sharpie to "bleed" through the print out paper onto the drawing paper. The sharpie will not bleed through completely, but it will give you a rough outline that you can draw over to give it a professional look.


One of the games I came up with for our party is a, "Pin the tail on the Cat in the Hat". In order to have this game we obviously need a "Cat in the Hat" picture. There may have been easier ways to do this, but they probably wouldn't be as crafty or hands on. I decided to draw the "Cat" myself. I am an okay drawer with pretty simple things. I had a lot of confidence that I could draw a pretty good "Cat" body, but the face was going to be tricky.
Next, I sketched his body onto a large piece of butcher paper with a pencil. The pencil is very forgiving when you mess up, so I always use it to outline my drawings. The "Cat in the Hat"'s body is pretty simple, so I just drew this free-hand.
The face is the tricky part, so I blew up his face on Microsoft Word and printed it out. I placed it where I wanted his face to be in the picture and traced over the print out with a sharpie. I traced around the black lines, and not on them. This allows the black sharpie to "bleed" through the print out paper onto the drawing paper. The sharpie will not bleed through completely, but it will give you a rough outline that you can draw over to give it a professional look.
After this, I finished the picture by tracing over my pencil lines on the rest of his body with the black sharpie.
This is a picture of the finished product once I traced over the whole thing.
I am really happy with the way it turned out. My plan is to take it back to school and have the kids color it in. Once it is all colored in, I am going to laminate it, cut it out, and tape it to the wall for our party! I will post pictures of it when it is all completed too!
Wednesday, January 30, 2013
Craft Room Crafts
So Dan and I moved into a small 3 bedroom house back in July. I love having all this space, but I really didn't know what to do with it either. We changed one bedroom into our guest room and the other bedroom we decided could be my office/craft room! My craft room is a project in itself! I have finally gotten around to organizing it which was the first step. And just recently I bought a plain bulletin board to make into a cute accent piece to the craft room. This is how I made my plain, boring bulletin board into a beautiful craft masterpiece! ;)


This is the bulletin board that I bought from Joanns for $6.00 after a 50% coupon!
The first thing I did was pick the fabric that I wanted to decorate my room around. It is a beautiful navy, green, white, and light blue floral fabric that I love! I decided to pick the deepest color in the fabric to paint my bulletin board. The deepest color is navy so I taped around the edges of the board and painted the sides navy blue with a simple acrylic paint. I used a small roller brush and it took two coats to get it on real thick. The whole thing took me only 2 hours which is a breeze!
After the paint dried, I cut the fabric to the size of the board and used cool metal tacks to keep it in place at the corners. Now I have a fun bulletin board to display crafts and post pictures of crafts I would like to do!
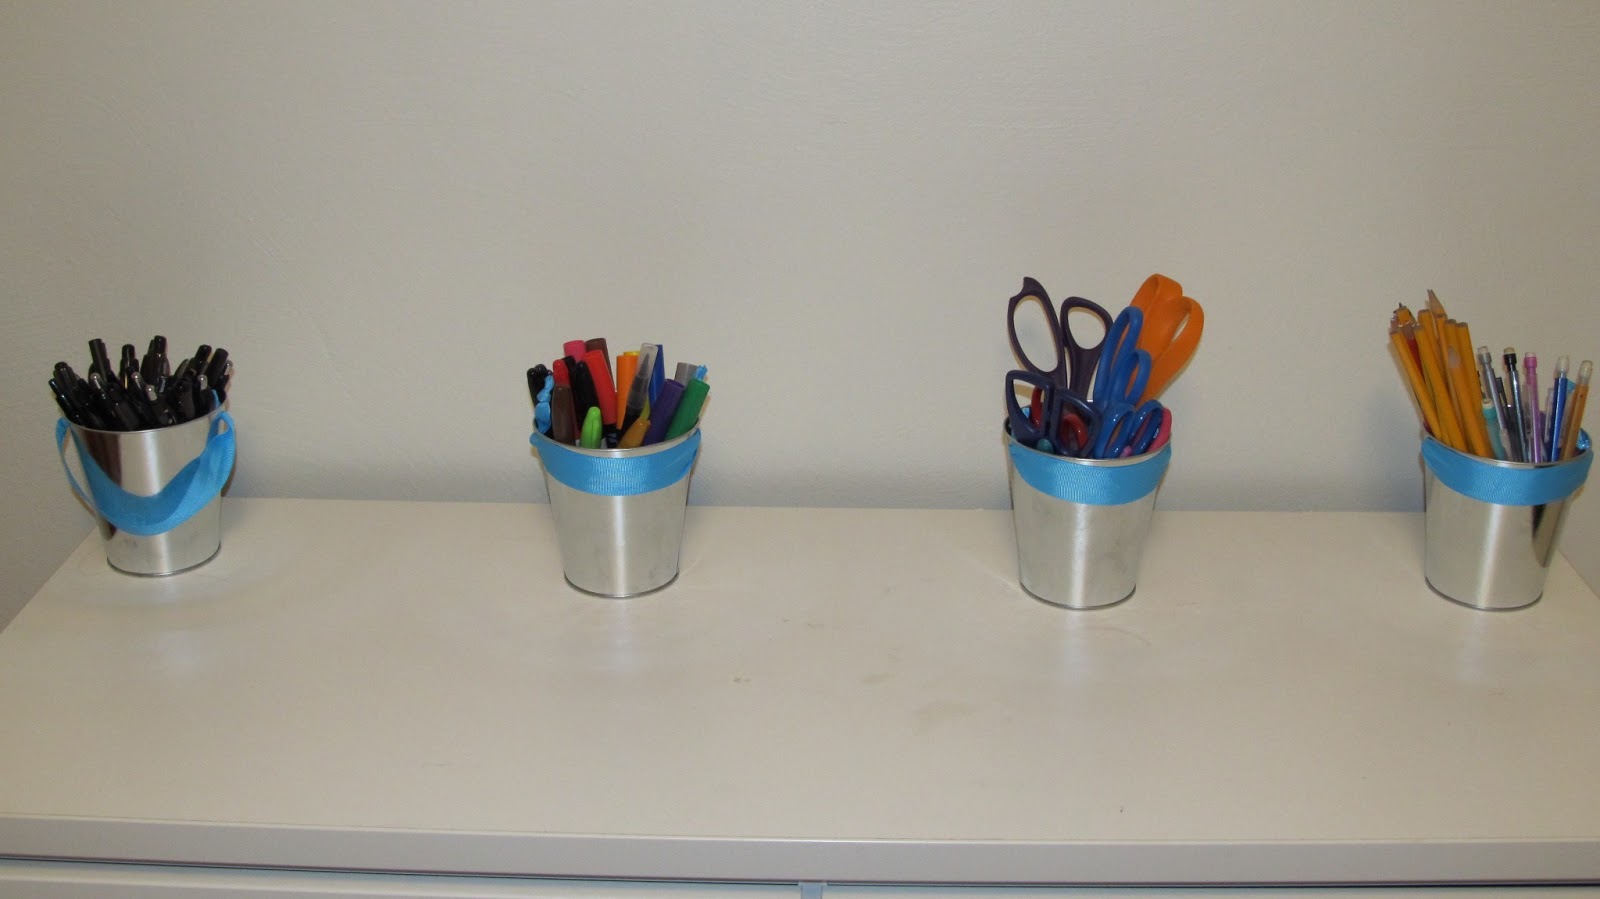
P.S. I found these cute buckets at the Target $1 spot and thought they would go so well in my craft room. I divided my craft tools into each one - one for markers, one for scissors, etc.
I love the pretty ribbons!
Saturday, January 26, 2013
Favorite Fishies
I decided I ought to contribute to this blog since I'm supposed to be one of the authors and all... With Lent fast approaching (difficult to believe... Christmas feels like yesterday) I thought I'd share one of my fast and easy favorite fish recipes my friend and I discovered a couple years ago.


To begin, I am a picky sea food eater. If it has a shell, I will probably pick at it and grimace. If it's chewy like shrimp anything or calamari, I will politely say NO thank you. I am beginning to develop a taste for crab meat, even though it's been slow-a-coming. But give me real fish like salmon, walleye or rainbow trout... and you'll wonder what happened to dinner!
I used to buy my fish fresh at a grocery store, mostly at Wegman's since I've been living out East. I still do sometimes, but we all know that fresh deli meats and fish break the bank fast. To try to save some money, I began searching other stores, and discovered these frozen, wild caught salmon fillets that come vacuum sealed packages. They are delicious and you can get them at Wal-mart for a very reasonable price.
In addition to salmon, you will need a rice of your choice (I prefer white for this recipe), coconut milk, salt, pepper, olive oil, green onions, and Hoisin Sauce.

To begin, add your desired amount of rice to a pot and add slightly under the suggested amount of water. I add a touch of olive oil to prevent sticking as well. Cook on medium. As rice boils and when water mostly evaporates, add the coconut milk to the rice and let it cook down. I suggest about half a can of coconut milk for a cup of rice.

Thaw fish in package (I use hot water and it takes 2-5 minutes) and add to a skillet or baking dish. I've cooked both on stove top and the oven. Add olive oil, salt, pepper, and begin to cook or preheat oven to 375 degrees and place on middle rack. I find the stove top to be quicker.

I'm not entirely certain how long I cook it for... I just know that when the fish begins to flake and comes apart easily, it's done. I would estimate about 6-9 minutes on the stove top and 15-20 minutes in the oven.
When the salmon is mostly cooked through, I add Hoisin Sauce to the pan and garish with some green onions. Allow to cook another minute or so, to heat up the sauce and cook onions a bit. And here's the finished meal!

I like to supplement this meal with corn on the cob and biscuits or breadsticks... and of course, a good glass of wine. Enjoy!
Beading
Well, hello January! Since you are just about over and all...
Obviously New Year's resolutions aren't my strong point.
Onto some success stories! I made a lot of Christmas gifts that my family members loved! My Aunts and Uncles really enjoyed the ornaments I made for them. They were quite an upgrade from the last ornament I made them, say, oh, twenty years ago. Glass instead of styrofoam- yipee!
I made about ten pairs of earrings, which of course I didn't take pictures of. I suppose I'll just have to recreate them. However, I do have four new pairs I just finished and I do have pictures of those!
I found these red glass beads at JoAnns over Christmas break and thought they were really neat.

The beads at the bottom of these have little rose pictures painted inside. They were too pretty to pass by at a speciality beading store I found in Winchester.

I made the following two on the same day. The pink ones look like mother of pearl. The green ones were inspired by a pair of earrings my friend made me for my birthday.


So I think I need to find a better way to display these because I'm hoping to make more and perhaps sell online. Or, perhaps I'll just keep them for myself :)
Obviously New Year's resolutions aren't my strong point.
Onto some success stories! I made a lot of Christmas gifts that my family members loved! My Aunts and Uncles really enjoyed the ornaments I made for them. They were quite an upgrade from the last ornament I made them, say, oh, twenty years ago. Glass instead of styrofoam- yipee!
I made about ten pairs of earrings, which of course I didn't take pictures of. I suppose I'll just have to recreate them. However, I do have four new pairs I just finished and I do have pictures of those!
I found these red glass beads at JoAnns over Christmas break and thought they were really neat.
The beads at the bottom of these have little rose pictures painted inside. They were too pretty to pass by at a speciality beading store I found in Winchester.
So I think I need to find a better way to display these because I'm hoping to make more and perhaps sell online. Or, perhaps I'll just keep them for myself :)
Subscribe to:
Posts (Atom)