Showing posts with label Crafty Corner. Show all posts

Tuesday, January 28, 2014

Declan's Baptism!

My little Declan was baptized into the Church yesterday! Although we wanted to have him baptized right away, he was born during the holidays which made it impossible to fit a baptism in. We thought having the baptism at the end of January would give our families plenty of time to recover from the end of the year festivities. However, we weren't planning on the weather being SOOOO terrible. Seriously terrible. My in-laws came in the night before and were able to avoid most of the snow and sleet, but driving to church the next day was downright treacherous. We slid out several times but somehow managed to get there - if not a few minutes late.

I love to be crafty and creative with parties. This was the first one I was hosting at our house for both of our families so I was feeling the pressure. I had planned on doing many other crafty things for his party but had to scale back my endeavors when I realized I can't get much done with a newborn.

The first thing I did was make a banner to be a focal point for picture taking. I got three different kinds of scrapbook paper with similar colors to tie all the decorations together. I chose a blue, brown, and white scrapbook paper as the background to my banner. I then just printed out the letters in Microsoft word and cut out the paper in the form of a triangle to make the banner.


Next I am pretty obsessed with the saints. I have the entire four volume edition of Butler's Lives of the Saints. I had a lot of fun going through these books to find a good saint name that I wanted to use. Because many people have never heard of Saint Declan, I decided to type up a quick synopsis of his life(which is pretty cool by the way). My Declan's middle name is Charles so we chose Saint Charles Borromeo as his other patron saint. I typed up his bio as well. I glued the bios to scrapbook paper, made a header, and put up pictures of Declan on the wall to flank my main table. 
I think they turned out pretty well! 


For my main table, I made a tissue paper flower to hang over the table. Then draped the table in a blue tablecloth. I arranged the beverages, cake, and little sweet treats on the table. For one of the sweet treats, I got blue vanilla candies from Michael's, arranged them on pretzels and then put them in the oven at 200 degrees for 5 minutes. I wanted to make sure they were melted enough to add a white chocolate chip on top. (This is all to go with the blue Baptism theme ;)). I am kicking myself for not getting a picture of the finished product before they were all gobbled up. Oh well. Next time....

Finally, you can't have a party without party favors right? I wanted to somehow incorporate a prayer into the favors so I decided to make Hershey bar covers. I went onto Hershey's website, printed out their covers to use as a template. Then I went on Microsoft word and measured my covers to the size of the official Hershey ones. I created a border, added a Baptism clipart, and a little prayer for our guests to say for Declan on his baptism day. I am super thrilled by the way these turned out. They were a big hit at the party!

The party was a success and I felt a little foolish for stressing out about it the way I did. But the first party is over an done with so i feel like I will be more relaxed for the next one. One final picture of the whole thing put together. 


Tuesday, January 14, 2014

Sewing .101

Yes, there is a decimal in front of the 101... This post is for the sewing impaired or pregnant brain sewer or both.

I mentioned in my last post that I finally broke down and bought a sewing machine. After agonizing over reviews, I finally decided to take the plunge and order it. Electronics and I don't usually get along; I can order them brand new and usually something is defective, so other than the fact that I know zero about sewing, I was also nervous about spending a lot of money. A little superstitious, I know. I went for this computerized machine, the Brother XR9500PRW.
 
I really really like it! So far I haven't found any defects, but I've also only tried one type of stitch and sewing square projects, but hey, you have to start small sometimes. The machine was really easy to set up; no problems with threading or winding the bobbin or even raising the bobbin thread (I hated doing this on the other machine I was using).
 
 
However, despite the beginner friendliness of this machine, I still manage to make major sewing faux pas. For example, today the seam ripper is my best friend... or worst enemy (I haven't decided, but I sure picked up that pointy little guy with great resignation after discovering my mistake). I'm making these cute burp cloths for my sister-in-law.
 
The tutorial has been great! I finished one the other day.


Since then, the sewing machine and ironing board have been taking up all the space in my kitchen, forcing hubby and I to eat in the living room while watching 2-3 episodes of Chuck on Netflix. Our life is so hard, I know.
 
Anyway, I promised him I'd finish the second burp cloth today and put the kitchen back together tonight (he wasn't complaining or asking me to). After work, I sat right down and pinned my pieces together and started sewing. I even remembered to back stitch before starting! I finished up sewing all the way around and was pretty proud of my even stitches. Feeling pretty good, I clipped off some of the extra fabric on the corners so they would be pointier and went ahead flipping my project. Lo and behold... I had pinned the wrong sides together. REALLY!? How had I managed that!?  So, here I am, ripping out the seams, taking a break to blog about it and attempting to rally myself to try again.
 
 
Tips:
1. take time to breathe before coming home from work and starting a craft project.
2. Double check your fabric to make sure the wrong sides are facing each other if you need to flip the project, and not just one wrong side and one right side (face palm).
3. Always remember to backstitch.
4. When you have to seam rip... take lots of breaks, eat lots of chocolate in between, and turn on some good music.
5. Don't give up! Even you can learn to sew ;)
 
Some actual helpful beginner sewing articles:


Thursday, April 18, 2013

I'm Finally Finished!

I'm finally done! I did it! I made the adorable little clutch that Theresa posted... umm... errrr... a MONTH ago!? Please keep in mind this is my first sewing project in ten years.

I found my fabric and started cutting....


Note that these pictures do not include the multiple scraps I made by not paying attention to the sizes I should have been cutting.

Then I got out the sewing machine. With my nose in the manual, my encouraging husband commented that it looked like it would be easier to just go out and buy a bag....

I loaded the bobbin up and shoved it in the shuttle. Then I successfully threaded up the machine with my wonderful, bright pink thread. I was feeling pretty pleased at this point.

Then I tried raising the bobbin thread. FAIL.

I called mom and I called friends. No success. Had to wait until Monday to bring it to my friend who generously loaned me the machine. Monday sort of turned into Wednesday because I forgot the machine one morning and left it in the car Tuesday.

Thus why it is now Thursday.

But look at how adorable it is!!!


Ok, I have a lot to learn in the sewing department. The corners and sides are a bit wobbly, but I was very happy with my first attempt. I can't wait to find more great fabrics to make this little bag in as well as try more sewing projects!

For directions, please visit Theresa's earlier post. She has some great tips. Or, the original blog, The Elm Street Life by Whitney.

Monday, March 18, 2013

The Perfect Little Clutch

After trying to find my sister the perfect clutch purse for her birthday, I was exhausted! I ended finding one that was good enough, but most of them were either too expensive or just not pretty. So, I decided that I was going to figure out how to make my own, so that in the future if I needed a clutch for a certain occasion, I could just whip one up! I ended up finding a great blog called The Elm Street Life with incredibly easy instructions on how to make a basic clutch, but a very pretty one. I did not actually take too many pictures when I was doing this project, so the pictures below are just an overview of the fabric and the way it turned out!


These are the materials that I used. I used black linen for the outside, and this beautiful floral cotton fabric for  the lining. Finally, the white is the 808 Pellon interfacing that the instructions call for. With my coupons for Joanns, the whole clutch cost me only $12 to make!


The end result!


One of my favorite parts - the awesome lining!


Like I said, Whitney's blog, The Elm Street Life has such great instructions for this bag! They are easy to follow for even the beginner sewer. My clutch only took me two nights to sew together. Check it out!


Saturday, March 9, 2013

Refurbished Desk

This desk has been in my parents' house for as long as I can remember. It was built by my uncle and then given to my parents. My mom used it as her sewing desk before she replaced it with a newer version. So, for the past few years, it has sat in my parents' garage collecting dusk and spider webs. When Dan and I moved into our new house, I mentioned to my mom that I was looking to buy a cheap desk for my craft room. She suggested I use my uncle's desk which I wasn't exactly thrilled with, but decided to give it a try. I've always been interested in learning how to sand and paint furniture so this was the perfect piece to try it on!

The first thing I did was sand down the desk with a 60 grit sponge hand sander to get the stain sealer off. Then I went over the desk with my electric 80 grit sander to smooth it out.

Then I used Zinsser White Primer to prime the desk for the paint. I decided to do two thin coats of primer on the desk leaving a few hours in between each coat for it to dry. 
I then used Olympic Latex Satin White Paint to coat the desk with two coats of paint. I felt like I needed those two coats to even everything out. (As you can see, I took this picture after finishing the project ;) )
Finally, I used Minwax Polycrylic Sealer to seal in the paint. I just used one coat to seal in the paint and it works great!


As the final step, I picked out new hardware from Lowe's and assembled them on the desk. I love the finished project and feel like it is a completely new desk!

Saturday, March 2, 2013

Dr. Seuss Part 2

So, I was originally going to post these projects one-by-one in parts 2, 3, 4, etc. but as life would have it - I just didn't get around to it! So, here are all the Dr. Seuss projects that I had at my Dr. Seuss party yesterday! It was quite a success and all the children and their parents had a lot of fun!

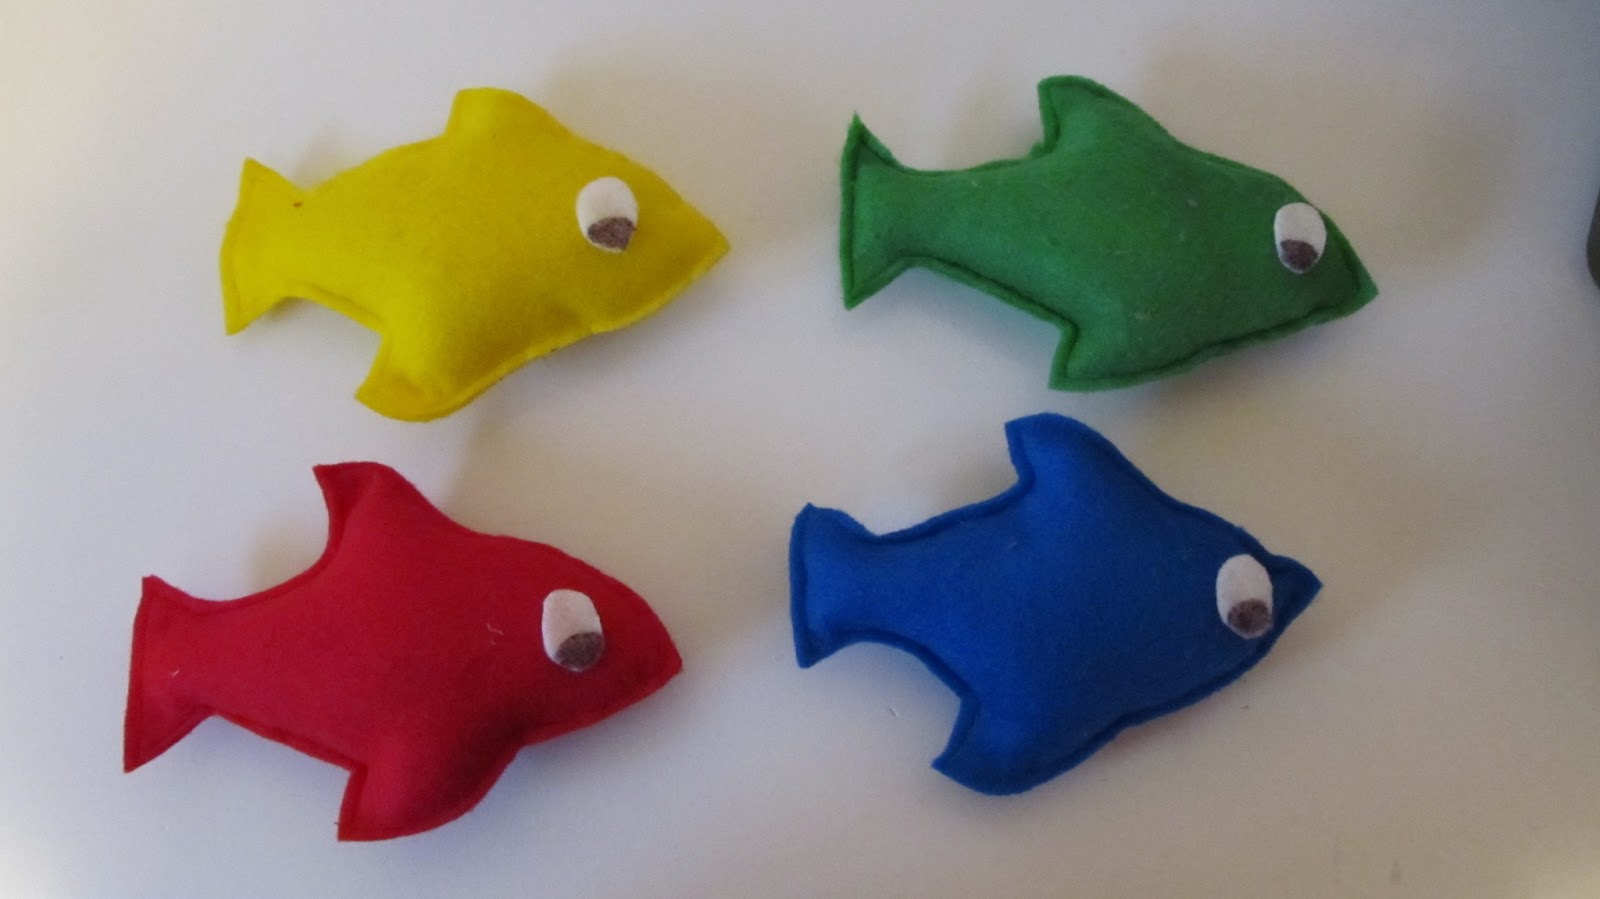
1. One, Fish, Two Fish Toss Game

The first thing I did was find a picture of a fish online that I liked and would be easy to cut out. Then I pinned  it to a piece of felt and cut out two identical pieces.

 Then I sewed the two pieces together and left a small hole as an opening so that I could stuff it.

 I stuffed the fish with some "fluff" that I use for stuffing pillows. I then pinned it back together and sewed it closed.

The last step was adding a white felt eye for each of them and they were all finished! The kids really enjoyed taking turns tossing the fish in the basket!

2. Costume

For the party, my co-teacher and I decided to dress up as Thing 1 and Thing 2. I got two red t-shirts at JoAnns for $3.50 and decided to sew on the logos! I learned how to print on fabric from Pinterest (of course). You iron your fabric onto freezer paper and it makes it stiff enough to go through the printer!

I printed out a Thing 1 and Thing 2 logo on the fabric. 

I cut it out and decided to add a second layer of fabric under it to make it thicker and not so see-through.

I used a liquid stitch to keep it tight against the shirt. I then added a quick stitch around the outside for reinforcement.

I'm pretty happy with the way they turned out!

3. The kids' projects

This was a project that I came up with that day! It is the Lorax's Truffula Trees! I used yellow pipe cleaners and feathers on orange paper to really give it a Lorax-feel!

I also came up with this that day! We realized we didn't have enough crafts for the party so I cut the different pieces of the Lorax's body and had the kids glue them together!

This is a project off of Pinterest, so I can't claim creative rights to it ;). But I couldn't help post this because it came out so cute! We painted the bowtie and penne pasta red and white! We printed out the Cat in the Hat face and glue it onto a clothespin! To finish it we hot glued a magnet on the back so it could be a refrigerator magnet for the kids artwork!

4. Finished Cat in the Hat


I let the kids color him - I think they did a pretty good job! Then I laminated it and cut it out. He was a wonderful addition to our party!

5. The snack

The last thing we did was a Green Eggs snack. Unfortunately, I did not get any pictures of it, but it came out really cute! We dyed pudding green to make the green part and added a vanilla wafer in the middle to make the green eggs!


I'm sorry this post is sooooo long, but I hope you enjoyed it as much as I did!


Thursday, February 28, 2013

The Beauty of a Rose

My husband is so sweet and so talented. St. Valentine's day was a bit hectic. I had the day off but inevitably found myself running all over doing errands and babysitting. I'm terrible at gift giving and keeping secrets, so Jeremy already had his present early- a box of chewy Star Crunch (excuse: St. Valentine's day fell after Lent already started, and I decided it would just be cruel to give them to him on Thursday and make him salivate over them till Sunday).

When the day was almost over, we burst into the house together where I beheld a beautiful rose and a box of the most AMAZING chocolates ever. This is pure objective fact- there is no subjective opinion when it comes to these raspberry chocolate truffles. And, I did salivate over them until Sunday.

WARNING: The creativity contained within this post is entirely my husband's (once again).

Jeremy and I share a digital SLR camera, which he has mastered and I fondly like to stare at and dream about taking wonderful shots. While reading, I noticed Jeremy stealing my rose away. Having piqued my curiosity, I followed him upstairs where he had the rose in our spare room and the camera out. I eyed his set up skeptically. Our spare room could interchangeably be called the junk room. How was he going to make this rose look pretty without the mess detracting from it's beauty?
I'm not even sure if this is the fully edited picture, but I think the end result is gorgeous! The background was dark blue (our spare comforter) and I'm not positive how it turned black, but he figured it out!

Here are some more pictures we both took and made into a calendar for our relatives this past Christmas. Jeremy probably took all the really good ones.

There are more, but I thought I'd share the more "springlike". We are getting tired of the cold here and are in the midst of planning a trip to Myrtle Beach. Hopefully more fantastic pictures to come soon!

Saturday, February 2, 2013

The Cat in the Hat (Part 1)

So, most Preschool/Elementary Educators know that Dr. Seuss' birthday is coming up on March 2nd. With all the much-needed breaks Dr. Seuss books provide us (they serious take about 20 minutes to read, but yet the children are somehow entertained through the whole thing)....how could we not remember the man's birthday? So we are having a "Birthday Party" for Dr. Seuss at my preschool on March 1st. First of all, I have a secret passion for themed parties in general, but a children's themed party is just going to be over the top! Luck for me, I work with another teacher who is just as into this party as I am. So, as we start planning and making things for this, "Dr. Seuss Birthday Party", I will be posting them on this blog which is why this one is labeled as "part 1".

One of the games I came up with for our party is a, "Pin the tail on the Cat in the Hat". In order to have this game we obviously need a "Cat in the Hat" picture. There may have been easier ways to do this, but they probably wouldn't be as crafty or hands on. I decided to draw the "Cat" myself. I am an okay drawer with pretty simple things. I had a lot of confidence that I could draw a pretty good "Cat" body, but the face was going to be tricky.

So the first thing I did was find an image that I wanted to copy. This one fit because it would be easy to make the tail detachable for the game.

Next, I sketched his body onto a large piece of butcher paper with a pencil. The pencil is very forgiving when you mess up, so I always use it to outline my drawings. The "Cat in the Hat"'s body is pretty simple, so I just drew this free-hand.

The face is the tricky part, so I blew up his face on Microsoft Word and printed it out. I placed it where I wanted his face to be in the picture and traced over the print out with a sharpie. I traced around the black lines, and not on them. This allows the black sharpie to "bleed" through the print out paper onto the drawing paper. The sharpie will not bleed through completely, but it will give you a rough outline that you can draw over to give it a professional look.


After this, I finished the picture by tracing over my pencil lines on the rest of his body with the black sharpie. 

This is a picture of the finished product once I traced over the whole thing.

I am really happy with the way it turned out. My plan is to take it back to school and have the kids color it in. Once it is all colored in, I am going to laminate it, cut it out, and tape it to the wall for our party! I will post pictures of it when it is all completed too!


Wednesday, January 30, 2013

Craft Room Crafts

So Dan and I moved into a small 3 bedroom house back in July. I love having all this space, but I really didn't know what to do with it either. We changed one bedroom into our guest room and the other bedroom we decided could be my office/craft room! My craft room is a project in itself! I have finally gotten around to  organizing it which was the first step. And just recently I bought a plain bulletin board to make into a cute accent piece to the craft room. This is how I made my plain, boring bulletin board into a beautiful craft masterpiece! ;)


This is the bulletin board that I bought from Joanns for $6.00 after a 50% coupon!


The first thing I did was pick the fabric that I wanted to decorate my room around. It is a beautiful navy, green, white, and light blue floral fabric that I love! I decided to pick the deepest color in the fabric to paint my bulletin board. The deepest color is navy so I taped around the edges of the board and painted the sides navy blue with a simple acrylic paint. I used a small roller brush and it took two coats to get it on real thick. The whole thing took me only 2 hours which is a breeze!


After the paint dried, I cut the fabric to the size of the board and used cool metal tacks to keep it in place at the corners. Now I have a fun bulletin board to display crafts and post pictures of crafts I would like to do!

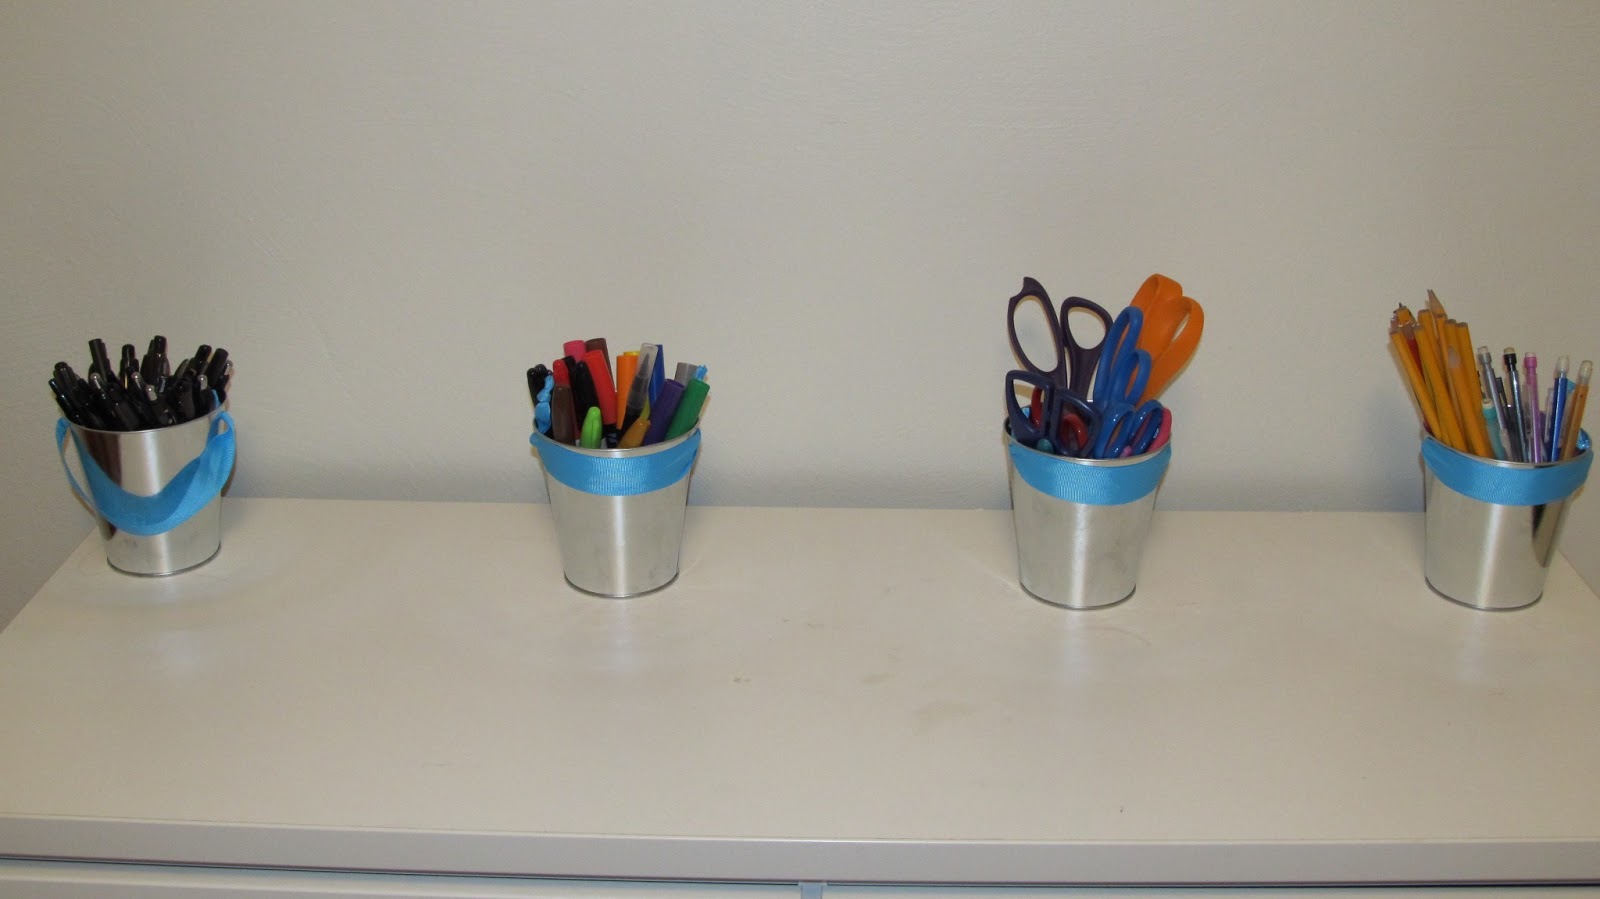
P.S. I found these cute buckets at the Target $1 spot and thought they would go so well in my craft room. I divided my craft tools into each one - one for markers, one for scissors, etc.


I love the pretty ribbons!